


Blogging #2: Setup Wordpress
Learn how to get Wordpress up and running in under twenty minutes

Hello, and welcome to the second installment in the Blogging Substack 👋
While I could write an article or two comparing different blogging platforms, I think that would just waste time and stand in the way of getting your blog off the ground. So instead, I think it’s better to just stick with the gold standard - Wordpress.
I’ve been using Wordpress for over ten years, it’s easy to use, has an incredibly deep library of themes and plugins, and you’ll never need to write a single line of code. On top of all that, you can honestly get Wordpress up and running in under ten minutes, but I’ll double that just to be safe.
If you’ve been holding off on starting a blog because you don’t know how to start, by the time you’re doing reading this you’ll be out of excuses. Seriously, it’s insanely easy, involves no coding or hosting experience, and it doesn’t break, it just works.
Just like I could write multiple articles comparing different blogging platforms, I could do the same for Wordpress hosting options, but that would also just slow things down and get in the way of you starting your blog. So, I’ll stick with the gold standard for Wordpress hosting - WPEngine.

So what exactly is WPEngine?
WPEngine offers what is called “managed hosting,” which essentially means, experts handle all the details behind-the-scenes when it comes to hosting, backups, security, you name it. It’s like having your own full IT Department, except you pay a fraction of the cost you would to actually have the staff, and you get the benefit of 24/7/365 reliability.
Of course, this isn’t free, but it’s also not expensive. Most people will start with the “Startup” plan which costs $30/month or $300/year if you pay annually. If you’re serious about blogging, you should be willing to spent about $500 - $1,000 a year on your blog for the first couple of years. Hosting is the most critical service you have since it dictates how quickly your blog loads, how available your blog is, and how safe and secure it is over time.
The beauty of using WPEngine is that the entire setup process of launching a Wordpress blog takes less than ten minutes. Now let’s walk through the process from start to finish 🥳
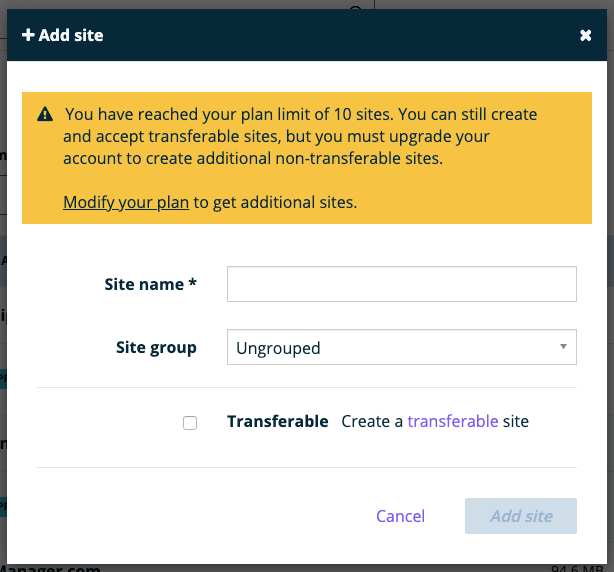
Step 1: Click “Add site” and give your site a name
Okay, this step should take you about twenty seconds. Simply give your site a name, I typically like to use the same name as my domain. So for me, under “Site name” I entered morganlinton.com.

Step 2: Name the production environment
In the next lesson I’m going to go through how to point your own domain name to your Wordpress site, but for now (and in all cases when using WPEngine) you’re going to setup a subdomain on WPEngine.com.
Don’t worry too much about this 🤷♂️ like I said, next week I’ll show you how to point your own domain name to your Wordpress site and this won’t matter at all. All names do need to be unique so if you’re trying to get johnsblog.wpengine.com, it’s probably taken and you might need something like johnsblog2.wpengine.com.
Once again, don’t spend more than a minute on this, nobody is ever going to see this domain, your own domain name will point to the site once we have everything rocking.

Step 3: Wait about five minutes
Is it before say 6:00PM, get yourself a cup of coffee, you’ve earned it ☕️ After 6? Grab a glass of wine, you deserve it 🍷
Now you just relax and sip your beverage. You’re using a managed hosting service so all the technical stuff is being done for you while you sit there like a boss getting caffeinated or buzzed. Kick your feet up so you feel even more like a badass.
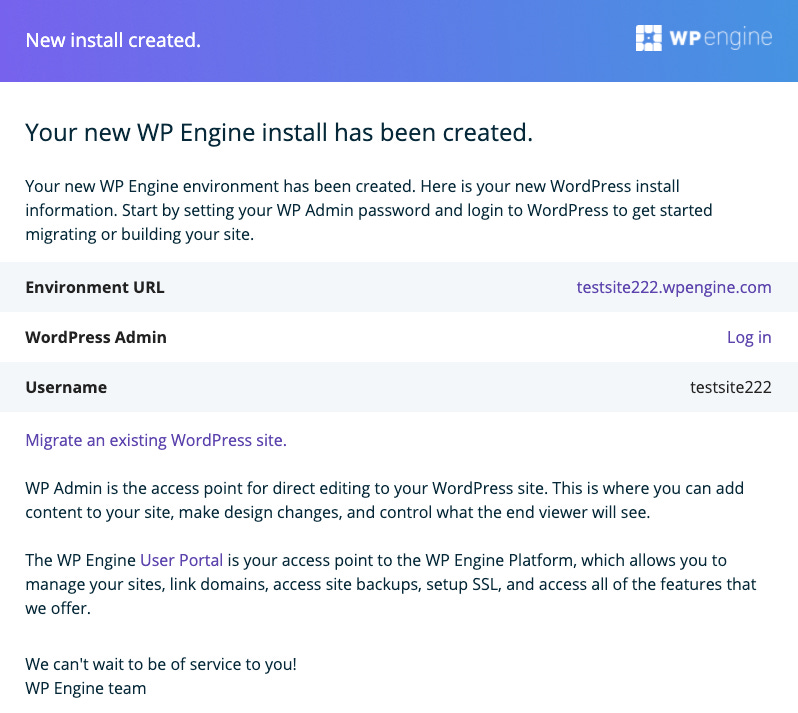
Step 4: Login to your new Wordpress blog
After a few minutes, you’ll get an email that looks like this. Note that I called my blog for this test project “testsite222.wpengine.com” which is why you see that up there.
WPEngine will make your username the same as your subdomain, so in this case, my username also becomes testsite222. Once again, don’t worry - you can change this later.
Click the “Log in” link in this email and you’ll be sent to a page that look like this.

This step can be a little confusing because the link did say “Log in” but you’re actually sent to a password reset screen. No need to be confused, just put that username that you received in the email from WPEngine, i.e. testsite222 in my case and hit the “Get New Password” button.

After you click the button, the page will refresh and you’ll see the login screen with a little note at the top telling you to check your email for the confirmation link. Head back over to your email, and you should see something like this waiting in your inbox.

At the bottom of the email, as you can see, it says - “To reset your password, visit the following address:” Click that long strange looking link.

Once you click on this link you’ll be taken to a page that asks you to set your password. You can use the one they suggest or create your own. My only main suggestion here is to not use a password that you use everywhere else. Either use the password Wordpress suggests or use a password manager like 1Password to come up with a secure one.
Done? Click the “Reset Password”
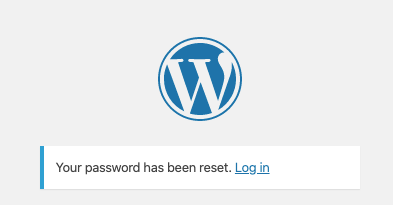
Step 5: Login to your new Wordpress blog
Congratulations, this is the moment you’ve been waiting for. It’s time to login to your shiny new Wordpress site ✨
Click the blue link there that says “Log in”

Now just put in your username and the password you decided on in the last step and hit the blue “Log In” button.

If you see something that looks like the image above - you’re in! This is your Wordpress Dashboard, don’t let it overwhelm you, it’s your friend, and I’m going to who you how to use it in great detail over the next few weeks.
You can also view the front-end of your blog by going to <your-blog-name>.wpengine.com, in my case this would be testsite222.wpengine.com

Beautiful isn’t it? Okay, it’s not, in fact, it’s pretty darn ugly. Don’t worry, we’ll fix it up and make it nice and snazzy in no time.
For now, there’s just two things you should know.
To login to your Wordpress dashboard you’ll simple go to <your-blog-name>.wpengine.com/wp-admin/
To see your blog in all it’s glory, just got to <your-blog-name>.wpengine.com
That’s it. Chances are you’ve spent ten minutes or less doing this, but I said it could take up to twenty so that if you took a little longer you don’t feel too bad.
In the next issue of the Blogging Substack I’ll show you how to point your own domain name to your Wordpress blog, then we’ll dive-into picking and configuring themes, getting some core plugins and SEO options setup, and before you know it - you’ll be blogging 🕺